3 Ways to Master Concave Mirror Ray Diagrams

Understanding the Basics of Concave Mirrors

Concave mirrors, also known as converging mirrors, are fascinating optical devices with a wide range of applications in various fields from physics to everyday life. These mirrors have an inwardly curved surface, meaning the reflective surface curves toward the light source, which leads to unique behaviors in light reflection. To truly master how light interacts with these mirrors, understanding the fundamentals of ray diagrams is crucial. Here, we'll explore three detailed methods to construct and interpret ray diagrams for concave mirrors, enhancing both your theoretical knowledge and practical application skills.
Method 1: The Reflection Rule for Concave Mirrors

Let's start with the foundational rules governing the reflection of light by a concave mirror:
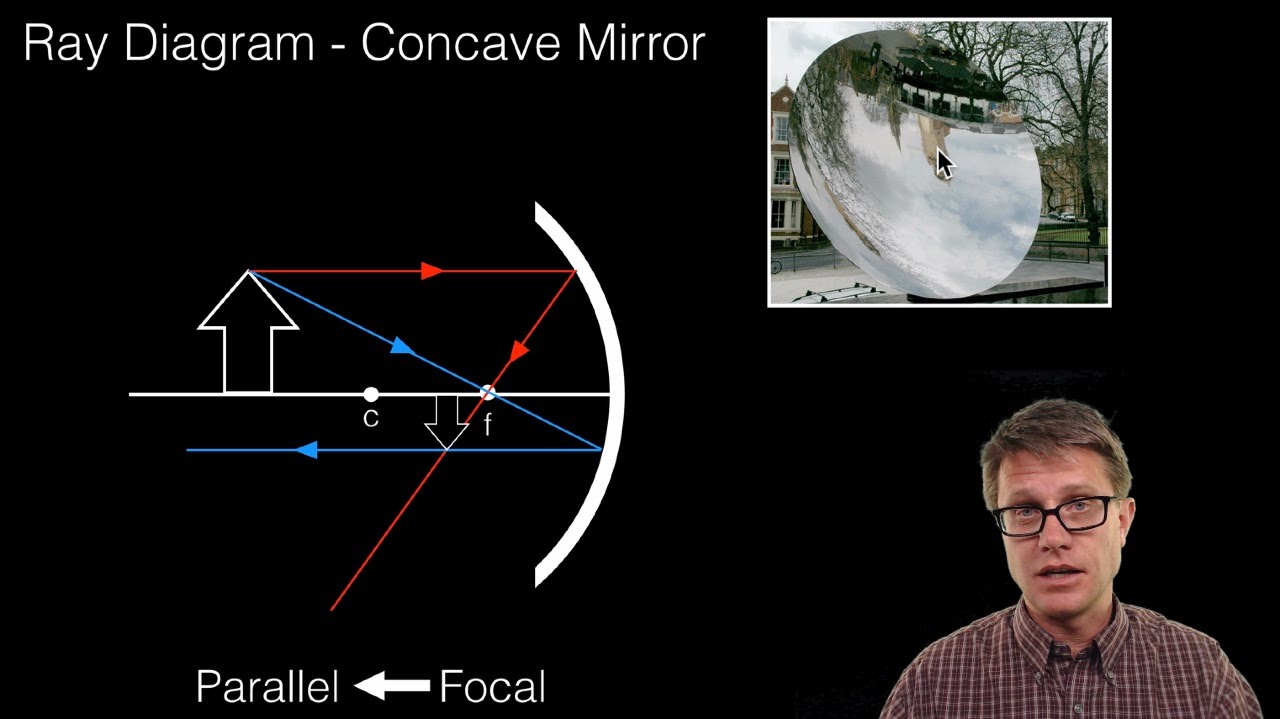
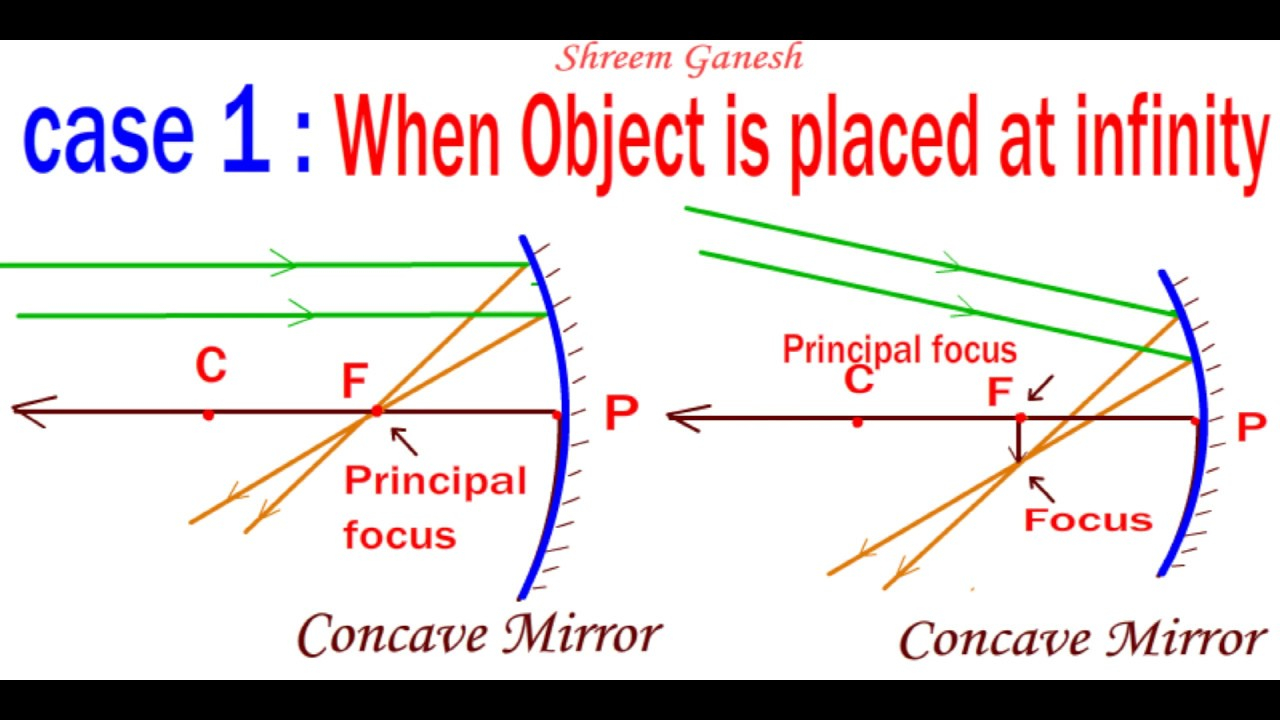
- Parallel Ray: Any ray of light parallel to the principal axis will reflect through the focal point (F).
- Focus Ray: A light ray that passes through the focal point before striking the mirror will reflect back parallel to the principal axis.
- Center Ray: A ray of light passing through the center of curvature (C) of the mirror will reflect along its original path.
To master these rules, follow these steps:
- Identify the principal axis, focal point, and center of curvature of the mirror.
- Draw the incoming rays according to the chosen scenario (for instance, from an object on the principal axis).
- Apply the reflection rules to each ray, drawing reflected rays based on their interaction with the mirror.
- Where the reflected rays converge or appear to diverge from, marks the location of the image.
🔍 Note: Ensure that you keep your pencil sharp to draw precise lines, as accuracy in drawing ray diagrams is crucial for the correct interpretation of image properties.
Method 2: Construction of Ray Diagrams

The construction of ray diagrams involves more than just understanding the rules; it requires practice to develop the ability to visualize light paths:
- Object Beyond C: When the object is placed beyond the center of curvature, draw at least two of the rays described above. The image will be formed between F and C, real, inverted, and smaller than the object.
- Object at C: Here, the image will be formed at C, real, inverted, and the same size as the object.
- Object Between C and F: This scenario results in an image beyond C, real, inverted, and larger than the object.
- Object at F: No image is formed because the rays parallel to the principal axis do not meet or appear to diverge.
- Object Between F and the Mirror: The image is formed behind the mirror, virtual, upright, and larger than the object.
To visualize these cases, you might find it helpful to use the following table:
| Object Position | Image Position | Image Type | Image Size |
|---|---|---|---|
| Beyond C | Between F and C | Real, Inverted | Smaller |
| At C | At C | Real, Inverted | Same Size |
| Between C and F | Beyond C | Real, Inverted | Larger |
| At F | At ∞ | No image | - |
| Between F and Mirror | Behind Mirror | Virtual, Upright | Larger |

Method 3: Application in Real-World Scenarios

Beyond the theoretical understanding, practical application of concave mirror ray diagrams is where the real magic happens. Here are some ways you can explore their uses:
- Makeup Mirrors: These mirrors are designed to magnify your face, making it easier to apply makeup. The object is usually placed between F and the mirror, creating an upright, enlarged, virtual image.
- Headlamps and Flashlights: Concave mirrors are used to focus light into a beam, reflecting all light rays through the focal point to maximize the light output and direct it forward.
- Reflecting Telescopes: Concave mirrors reflect light back to a focus, allowing you to see distant celestial objects. Here, the mirror reflects light parallel to the principal axis through the focal point, where an eyepiece then magnifies the image.
🔍 Note: In real-world applications, take into account the aperture and aberrations which can affect the quality and size of the image formed.
In conclusion, mastering ray diagrams for concave mirrors involves a deep dive into the principles of light reflection, precise construction of diagrams, and understanding the practical implications of these optical devices. Through consistent practice, visualization, and application, you can gain a profound appreciation for how light interacts with these uniquely shaped mirrors. Whether you're studying optics or working with optical devices, these three methods offer a comprehensive approach to understanding and applying the concepts of concave mirror ray diagrams.
What happens if an object is placed at the focal point of a concave mirror?

+
If an object is placed exactly at the focal point (F) of a concave mirror, no image is formed. The reflected rays from the mirror would be parallel to each other and not converge or diverge to form an image.
How do you find the focal length of a concave mirror?

+
The focal length of a concave mirror can be found by measuring the distance from the mirror’s surface to its focal point (F). This distance is equal to half the radius of curvature ® of the mirror. So, ( f = \frac{R}{2} ).
Can concave mirrors produce virtual images?

+
Yes, concave mirrors can produce virtual images when the object is placed between the focal point and the mirror. In this case, the rays of light diverge upon reflection, and when traced back, they appear to come from behind the mirror, forming a virtual, upright, and enlarged image.


