5 Essential Geometry Constructions for Beginners

1. Understanding the Compass and Straightedge

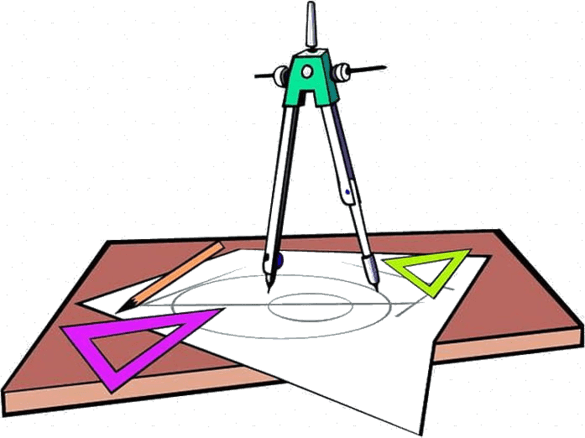
Geometry construction involves creating precise figures with just two tools: the compass and the straightedge. Unlike digital tools, these instruments demand a skilled hand and an eye for accuracy.
- Compass: An instrument for drawing perfect circles or arcs, the compass allows you to mark points or arcs consistently and precisely.
- Straightedge: A ruler without markings, used to draw straight lines connecting given points. It doesn't have any scale, as measurement isn't crucial for pure geometric constructions.
The Compass


A compass helps in creating circles or arcs that form the backbone of geometric constructions. It can also be used for:
- Transferring distances
- Bisecting lines or angles
- Finding perpendiculars
🔧 Note: To avoid piercing the paper, ensure your compass has a sharp, fine point. A wobbly or blunt compass point can lead to inaccurate drawings.
The Straightedge


Unlike a ruler, a straightedge is used for its linear edge, not for measuring. Here are some key uses:
- Connecting points to form lines
- Extending lines to infinity (conceptually)
- Creating parallel or perpendicular lines
2. Constructing an Equilateral Triangle

The equilateral triangle, with all sides of equal length, is one of the simplest shapes to construct using compass and straightedge.
Steps to Construct an Equilateral Triangle

- Mark a Point: Choose a point on your paper and label it ‘A’.
- Draw Circle A: Using the compass, draw a circle with radius AB (let B be a point on the circle). Keep this radius setting for the next step.
- Mark Second Point: From point B, draw another circle with the same radius, AB. Where this circle intersects the first circle, mark this point as ‘C’.
- Connect Points: Using the straightedge, connect A to B, B to C, and C to A, forming the triangle.

3. Bisecting a Line Segment
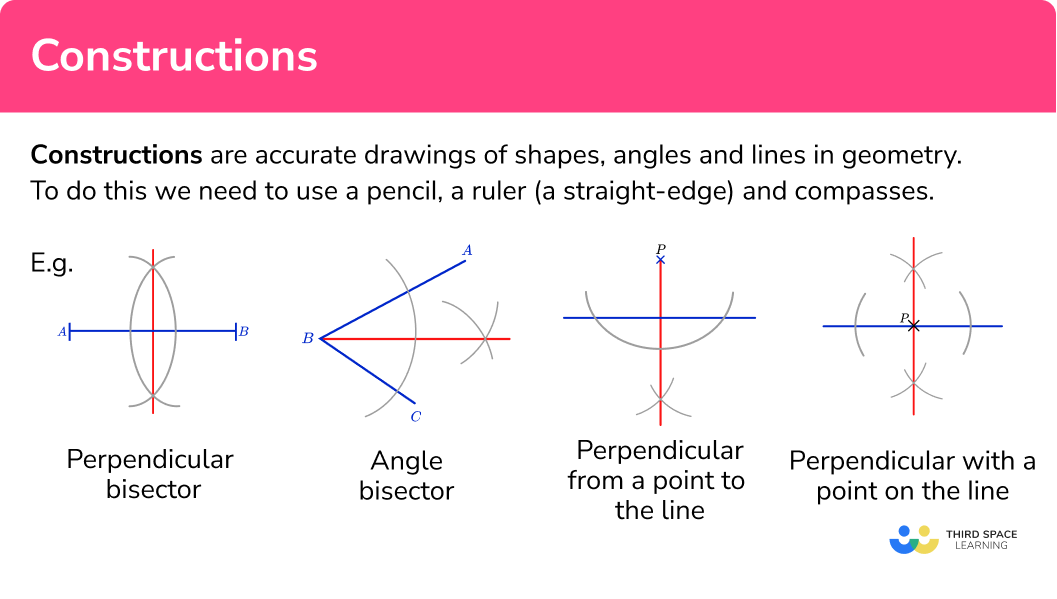
Line segments are bisected to find the midpoint, useful in many geometric constructions and proofs.
Steps to Bisect a Line Segment

- Draw a Line Segment: Use the straightedge to draw a line segment (AB).
- Circle Centers A and B: With your compass, draw circles with the same radius from points A and B. Ensure they intersect at two points.
- Mark the Intersections: Label these points of intersection as C and D.
- Connect Intersections: Using the straightedge, draw a line from C to D. The line CD will intersect AB at its midpoint, point M.

4. Constructing Perpendicular Lines
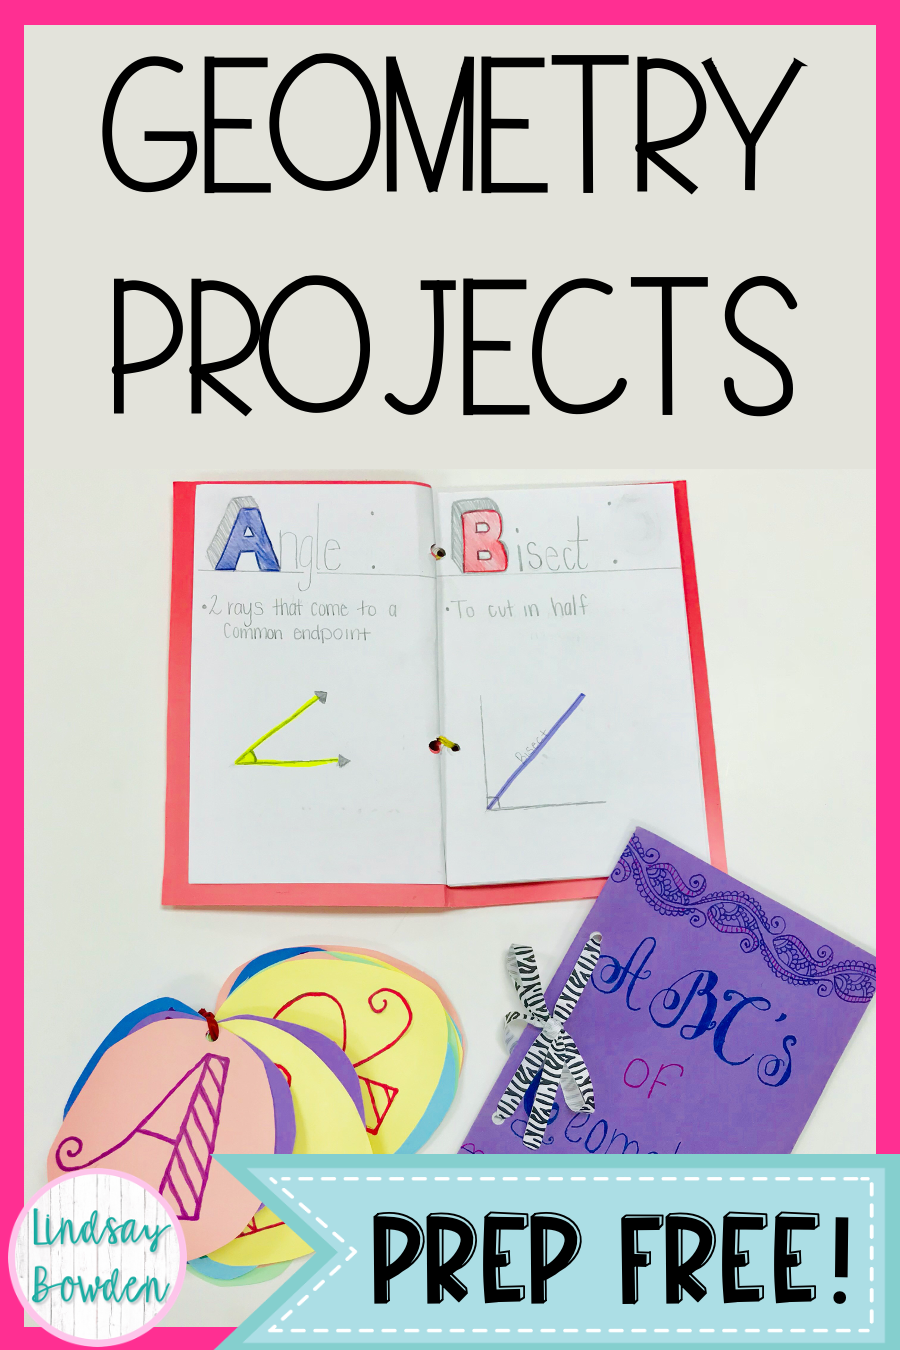
Finding a perpendicular to a line or line segment is essential for many constructions, like finding the altitude or perpendicular bisector of a line segment.
Steps to Construct a Perpendicular to a Line at a Given Point

- Mark a Point on the Line: Choose or be given a point P on line AB.
- Set Compass: Set your compass to a radius larger than half the segment.
- Draw Arcs: From point P, draw two arcs on either side of the line, not crossing it. Ensure the arcs intersect the line.
- Connect Intersections: Connect the intersections of the arcs with a straightedge to form a line through P, which will be perpendicular to AB.

5. Constructing a Regular Pentagon

A regular pentagon, with all sides and angles equal, demonstrates geometric elegance and symmetry.
Steps to Construct a Regular Pentagon

- Draw a Circle: Start with a circle. Label the center as O and the radius as r.
- Mark Diameter: Draw a diameter of the circle, and mark its ends as A and B.
- Construct Arc: From point O, with radius AB/2 (half the diameter), draw an arc outside the circle, intersecting the original circle at points P and Q.
- Find Golden Ratio: Connect A to P, then bisect AP. Label the midpoint as C.
- Draw Chord: From point O, draw a line to C, and extend this line to intersect the circle again. Label this intersection D.
- Mark Pentagon Points: Use the same radius to draw arcs from D and P, intersecting the circle at points E and F respectively.
- Connect Points: Connect A, B, D, E, and F, forming the pentagon.

In conclusion, mastering these five essential constructions is the foundation of geometric drawing. They are not just skills for academics but also build logical thinking, precision, and aesthetic appreciation for shapes. Each step in these constructions serves to reveal the underlying principles of geometry, showing how from simple tools and basic rules, complex shapes emerge with natural beauty and mathematical integrity. These constructions link the practical application of geometry to its theoretical underpinnings, fostering a deeper understanding of spatial relationships and geometric reasoning.
Why use a compass and straightedge instead of a ruler?
+
Using a compass and straightedge replicates the pure geometric construction techniques as they were taught historically. A ruler provides measurements which can introduce errors or shortcuts not aligned with the principles of geometry. These tools teach precision and the fundamental rules of drawing without the aid of modern measurement tools.
Can I use modern software for these constructions?

+
Yes, modern geometry software can simulate these constructions, but using physical tools imparts a tactile understanding of geometry that digital methods might not convey. Hand-drawn constructions encourage an appreciation for exactness, planning, and hand-eye coordination.
What if my compass won’t make a perfect circle?

+
If your compass isn’t drawing circles perfectly, consider:
- Sharpening the needle to prevent the compass from slipping.
- Ensuring the hinge is not too loose, allowing for steady movement.
- Using a better quality compass if issues persist.
