Effortlessly Delete Worksheets with VBA: Quick Guide

In the dynamic world of Excel, managing worksheets is a task that every user encounters at some point. While Excel provides various methods for handling worksheets manually, using VBA (Visual Basic for Applications) can significantly enhance your productivity by automating these tasks. Today, we're focusing on one crucial operation: deleting worksheets with VBA. This guide will walk you through the basics of VBA for Excel, demonstrate how to delete worksheets, and highlight important considerations to keep in mind during this process.
Understanding VBA in Excel

VBA is an event-driven programming language from Microsoft that's built into Microsoft Office applications like Excel, Word, and Outlook. For Excel, VBA allows you to automate repetitive tasks, perform complex calculations, manipulate data, and much more, all by writing scripts.
- Automation: Automate any Excel task from simple to complex with VBA.
- Customization: Create tailored functions, forms, and interfaces for Excel.
- Data Management: Efficiently manage large datasets with less manual intervention.
Let's dive into how you can use VBA to manage worksheets, specifically focusing on deleting them.
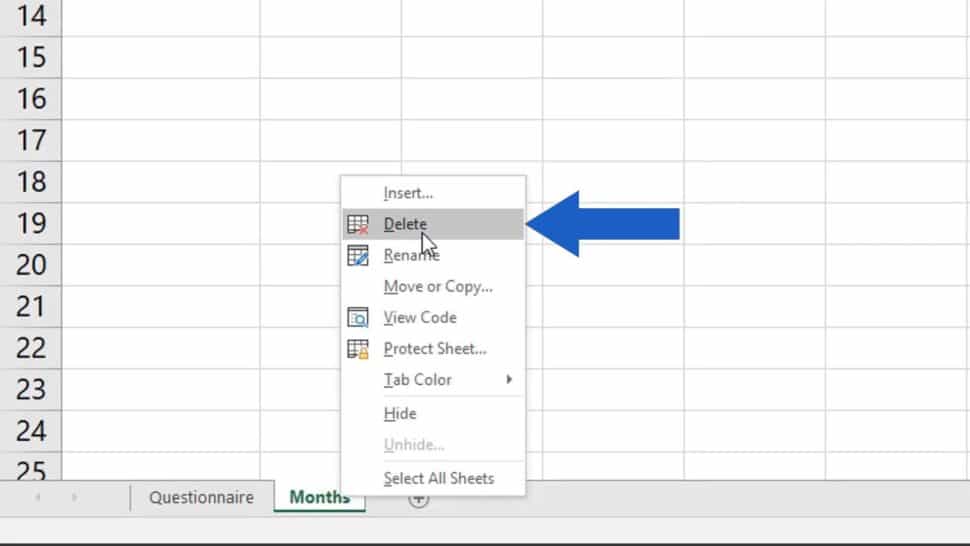
Deleting a Single Worksheet

To delete a worksheet in Excel using VBA, you'll need to:
- Open the Visual Basic Editor by pressing Alt + F11.
- Insert a new module into your workbook.
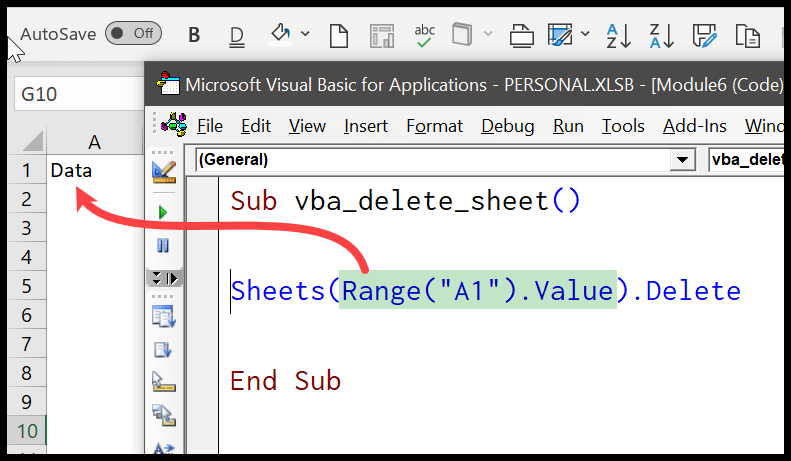
- Write the VBA code to delete the desired worksheet.
⚠️ Note: This code will delete the worksheet named "Sheet1" without prompting for user confirmation.
Deleting Multiple Worksheets

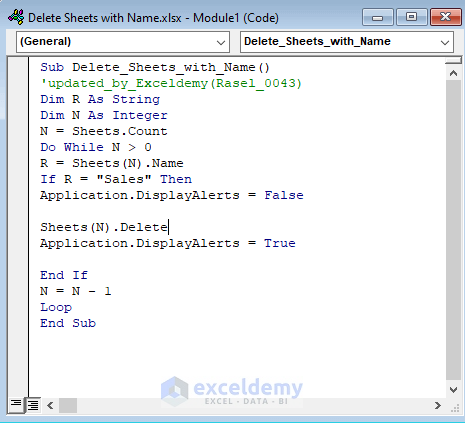
If you need to delete more than one worksheet, you can do so by looping through a collection of sheets:
```vba Sub DeleteSheets() Dim ws As Worksheet For Each ws In ThisWorkbook.Sheets If InStr(ws.Name, "Sheet") > 0 Then ' Assuming all sheets you want to delete start with "Sheet" ws.Delete End If Next ws End Sub ```⚠️ Note: This script deletes all sheets whose names contain "Sheet".
Important Considerations

- Backups: Always have a backup of your workbook before deleting sheets.
- Confirmation: When deleting sheets programmatically, consider whether to add a confirmation step: ```vba If MsgBox("Are you sure you want to delete " & ws.Name & "?", vbYesNo) = vbYes Then ws.Delete End If ```
- Error Handling: Use error handling to manage scenarios where the worksheet doesn't exist: ```vba On Error Resume Next ws.Delete If Err.Number <> 0 Then MsgBox "Worksheet does not exist or could not be deleted." On Error GoTo 0 ```
- Excel's Limitations: Excel has a maximum number of sheets you can have in a workbook. Deleting sheets can help manage this.
🛠️ Note: Consider testing your VBA code in a non-production workbook first to avoid data loss.
By automating the deletion of worksheets with VBA, you not only save time but also reduce the risk of human error associated with manual deletions. This can be particularly beneficial in large-scale data management tasks or when working with standardized templates where certain sheets are no longer needed.
FAQ Section
Can I undo worksheet deletion in VBA?
+
Once a worksheet is deleted with VBA, it cannot be undone unless you have a backup or you're using an Excel feature like AutoRecover. Always back up your data before running VBA scripts that modify worksheets.
What happens if I try to delete a non-existent worksheet?
+
If you try to delete a worksheet that doesn't exist, VBA will throw an error. To handle this, incorporate error handling in your code as demonstrated in the guide.
How can I prevent accidental deletion?

+
To prevent accidental deletion, include a confirmation dialog in your VBA script, allowing the user to decide whether to proceed with the deletion.
In summary, using VBA to delete worksheets in Excel not only automates a tedious process but also ensures consistency in your data management tasks. By following the steps outlined above, you can efficiently handle your Excel workbooks, safeguarding your work while enhancing productivity. Remember, automation should come with responsibility—always ensure you’re operating with backups and a clear understanding of your workflow to prevent data loss or unintended modifications.
