Easily Center Your Excel Worksheet Horizontally on the Page

Introduction to Centering Excel Worksheet

In Microsoft Excel, the layout of your data is crucial for clarity and professionalism. When you're printing spreadsheets or sharing them with colleagues, centering the worksheet on the page can significantly enhance the document's presentation. This blog post will guide you through how to easily center your Excel worksheet horizontally on the page using a straightforward process.
Why Center Your Excel Worksheet?

Before we delve into the steps, let's explore the reasons for centering your Excel worksheet:
- Improved Readability: Centering the data on the page makes it easier for readers to follow and analyze the information without feeling overwhelmed by white space or clutter.
- Professional Appearance: A well-formatted worksheet demonstrates attention to detail, which is essential for professional documents like reports or data analysis summaries.
- Minimizing Paper Usage: By centering your content, you're also reducing paper waste by ensuring the entire page is utilized effectively, especially if you're printing multiple pages.
How to Center Your Excel Worksheet Horizontally

Here are the steps to center your Excel worksheet horizontally:
Open Your Worksheet

First, ensure you have your Excel file open and the worksheet you want to center selected. If your workbook contains multiple sheets, click on the tab of the sheet you wish to work on.
Access Page Layout

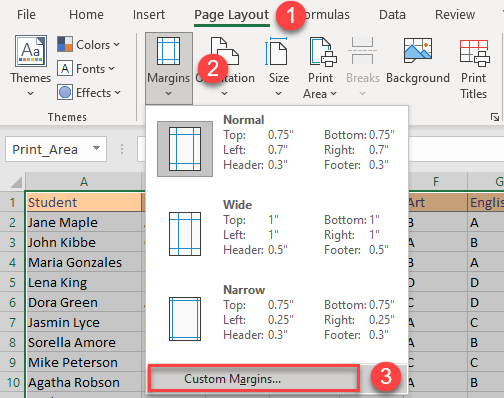
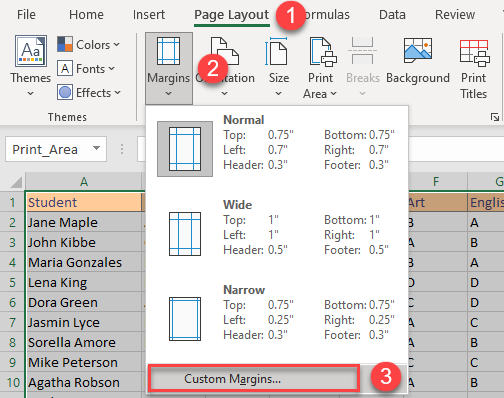
Navigate to the Page Layout tab at the top of your Excel interface. This tab is where you can manage the appearance of your printed worksheet.
Set Print Area

Before you can center your content, define the print area if you only want specific data to be centered. Here’s how:
- Select the range of cells you want to include in your printout.
- Go to Page Layout > Print Area > Set Print Area.
Access the Page Setup Dialog

Click on the small arrow in the bottom-right corner of the Page Setup group within the Page Layout tab to open the Page Setup dialog box.
Open the Margins Tab

In the Page Setup dialog box, click on the Margins tab. Here, you will control how your worksheet aligns on the page.
Center Horizontally

Check the box labeled Horizontally under the Center on page section. This action tells Excel to center the selected print area horizontally on the page.
🔥 Note: If you have already set a print area, Excel will center that area; otherwise, the entire worksheet will be centered.
Preview and Adjust

Before you print or save your centered worksheet, use the Print Preview feature to see how your worksheet will look:
- Go to File > Print.
- Examine the preview to ensure your worksheet is centered as expected.
If adjustments are needed, return to the Page Setup dialog or use the Excel ruler to further tweak the page layout.
Optimizing Your Worksheet for Centering

To ensure your worksheet looks its best when centered, consider the following tips:
- Scaling: Use the Scaling options in the Page Setup dialog to adjust the printout size if your data takes up too much or too little of the page.
- Adjust Margins: While centering, you can also fine-tune your margins to create a balanced appearance.
- Header and Footer: Ensure your headers and footers are appropriately aligned to maintain the document's consistency.
Here's how scaling works:
| Scaling Option | Description |
|---|---|
| Adjust to | Resize your data to a specified percentage. |
| Fit to | Adjust your data to fit a specific number of pages. |

Exploring Further Page Layout Options

Once you've centered your worksheet horizontally, you might want to explore additional options:
- Vertical Centering: If you need to center your worksheet vertically, you can check the Vertically option in the same dialog box.
- Print Titles: Set repeated rows or columns on every page for consistency.
- Orientation: Change between landscape and portrait to best fit your data layout.
✨ Note: Remember to preview your changes before printing to avoid any surprises with the final output.
By utilizing these techniques, you can create a well-formatted, professional-looking Excel document that's not only centered but also optimized for readability and presentation.
Will centering my worksheet affect the data alignment within cells?

+
No, centering your worksheet horizontally only affects how the worksheet is positioned on the printed page. The alignment of data within cells remains unchanged.
Can I center only a part of the worksheet?

+
Yes, by setting a print area that includes only the cells you wish to print. The centering feature will then center this defined print area on the page.
Does Excel center only horizontally or also vertically?

+
Excel allows you to center both horizontally and vertically using the options in the Page Setup dialog box under the ‘Margins’ tab.